Fellow tech friends, I have a find for you. If you have a job, or hobby, or whatever where you find yourself meddling with a bunch of .iso files, whether to boot off of them or just to access the data on them, then I have the device for you.
It all started after I backed the Kickstarter project for the isostick. Having never heard of a device before that would accept .iso images on a filesystem and then present them to the computer as a disc drive, I thought this was (and is) a pretty cool idea.
When browsing through the comments, I saw folks mentioning that this is just like the Zalman ZM-VE200 external hard drive enclosure. So of course I decided to do some research on this newly discovered gadget.
Overview

The Zalman ZM-VE200 at its core is an external sata hard drive enclosure. These have been around for a long time, allowing you to put your hard drive in an external enclosure and accessing the file system via a USB port. They are great for when you need to transfer a large amount of data and have an internet connection which isn’t up the the task in any reasonable amount of time.
This external enclosure can work just like that, an external USB drive. However, Zalman has added an extra layer of functionality on the enclosure by adding additional components which add features which I frankly haven’t seen anywhere else.
Zalman’s Additional Hardware Magic
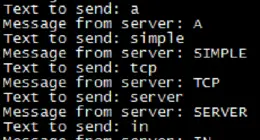
The additional circuitry allows you to select an ISO which is present on the drive, and load it just as if it were a DVD or CDROM on the system. This means that instead of carrying around discs to install operating systems on, you simply put the ISOs on the drive and then select the correct ISO when you boot.

When you boot/plug in the drive you actually have 3 modes available to you. Disc, Hard Drive or Dual. With Disc, files you place in the _ISO folder on the drive will be selectable via the wheel on the side of the device. As it was shipped the drive needs to be formatted as NTFS in order to show the ISO files, however with updated firmware you can actually use with FAT or NTFS.
Operation

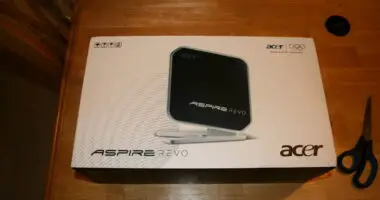
First thing you need to do is to install a SATA drive into the enclosure. This is pretty much a no-brainer, it only plugs in one direction. Slide the drive and circuitry back into the case and use the attached screws to secure the case to the drive/circuitboard. The screws are hidden by little rubber seals on the edge of the case.

When plugging it into the system, you interact with the drive in a few ways. The initial scroll wheel position, when powered up, determines the mode:
- Hold Up to enter ODD or “Disc” mode
- Hold Center to enter Dual mode (both HDD and ODD modes)
- Hold Down to enter HDD only mode

An eSATA port and cable are also supplied. I did not use this mode in my testing. It requires that you still plug in the USB cable for power requirements, and I would assume you would see faster transfer rates while in eSATA mode.
Finally there is a small switch that enables write-protect mode. This makes it so that you won’t be able to accidentally change the data on the drive.
The only problem I had with the drive was when I first plugged it into my system via a USB extension cable. The drive did not even turn on, it actually just clicked a little bit. I changed USB ports and then it seemed to work fine. Also I’ve run into a situation where I plugged in the drive to a system that was off and then booted it, and the screen lit up but stayed blank. I believe this is because this drive requires more power than some USB ports can deliver, so if you have problems with it, try another USB port first to see if that fixes your problem.
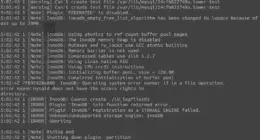
I also had some problems occasionally mounting the ISO file, usually booting into ODD mode (hold the scroll wheel “up”) seemed to fix this problem.
Final Thoughts
When installing operating systems from this drive, the process is notably faster. Meaning, the transfer speed you see off of the “disc” on the drive is much faster than a normal CD or DVD drive. While there were some technical hiccups and gotchas, the drive works very well.
This “gadget” is a must-have tool for system technicians who find themselves constantly burning ISOs to discs. My co-worker who initially made fun of my fondness for new gadgets has since said I’ll have to pry this drive from his cold, dead hands. It is so useful that I am now recommending it to all of my sysadmin friends. At $50 it is a steal and you will even make your money back because you won’t be burning so many discs.
Official Zalman ZM-VE200 Product Site
Buy From Amazon
(Updated Amazon link to SE product on 5/12/2012 – Thanks Skip!)


5 comments
Comments are closed.