
I was recently tasked with copying speaker’s presentations, files and handouts onto 100s of USB Drives (key drives) for a conference that work is hosting down in Washington, D.C. My first thought was that it was going to be a pain to have to copy/paste the files to each drive. I thought about creating a batch script to copy the files with a double click. But really, who wants to be doing all of that clicking and/or typing? Work smarter, not harder.
Then I remembered a neat feature that SyncBackSE, a program I use at home for backups, has available. The backup program – which is basically a file copy process – can be triggered based on the insert of a drive, whether that be a USB Key Drive or an External Hard Drive. Using the program, the only action you need to do to trigger the copy process is literally plug the drive in. After the machine recognizes the drive and mounts it to a drive letter, the copy process starts automatically.
Here are the directions on how to set this up.
-
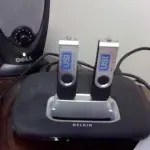
Prepare your system. Install SyncBackSE. I have purchased the full program at home, but since I am using this for a limited task you can just install the 30-day trial. Create a folder, on your desktop or location of choice, with the files you want to be copied to the filesystem. Copy files to that folder, this is your “source directory”. Plug in as many USB drives as you can, in my case I used a USB hub with two handy top USB ports. Note which letter these drives assign themselves as.
- Set up the Source and Destination. The Source will be the “source directory” of any files you wish to copy. The Destination will be the USB Drive Letter. If you are able to plug more than one drive in at a time, you will need to create separate profiles for each one, with differing drive letters. Create them at first or just copy the first profile you make, and switch the Destination Drive on each one.
- Modify the profile. This is where the magic happens. Under profile setup, go to “Click for Options” and check off “Expert”. Select When and then “Insert”. Check off “Run this profile when:” and select the drive letter under “is inserted into drive”. Also check off “Run unattended” – this will ensure it does not prompt you when you plug in your drive each time. The other options should remain with
. A summary of these settings is in the figure below.

That is it! Test by inserting a USB drive. You should see the profile change to “Running” then then “Success” after files have been completed. The screen will look as follows:

In my experience, the part that takes the longest was Windows XP discovering the new drive and then assigning the drive letter. This PC is slow, so I imagine on a faster machine this process would actually be much quicker. I ended up having to re-copy the drives since someone added their handouts in the last minute, but the drive discovery process happened much faster the second time around. I was able to do about 100 drives in 30 minutes, so this process is actually very speedy and works very well.


1 comment
Comments are closed.